Pages

Saturday, 10 August 2019

S.T.E.M


Each Friday Room's 2 and 3 get together to do S.T.E.M challenges. We split the 60 kids into groups of 4 and they are given the challenge. Together as a group, they are to brainstorm how they are to meet the intended outcome and how they can do it as a team. 

On Friday (yesterday) the children had to make a structure out of paper using glue or sellotape. 

We gave them an example of what it could look like from BabbleDabbleDo. 

Engineering for Kids: Make building blocks out of paper! Great way to illustrate how shape affects strength.


When they brought back their planning sheet to be checked they were given their materials. They were given a set amount of time to create their design. 

When the time was up, we went around and began testing their designs. Those who failed were given the opportunity to adjust their design to try again. 


Some of the students have found it hard to work together, they find it hard to share and accept ideas. They also find it hard to share the roles within the group. 

Monday, 5 August 2019

Novel Study


This term for reading I have wanted to try something a bit different in my reciprocal and guided reading groups. For the first time ever I have decided to try a novel study.  I used a range of resources online such as Teacherpayteachers, Twinkl and Pinterest and decided to try my own.

I chose a book that would interest both the boys and the girls. I created a slideshow that has both comprehension questions and has a range of tasks that meet their needs to create a deeper understanding. 

So far we are in our second week of this and it is going really well. 


What do you do for novel studies? 

Tuesday, 25 June 2019

DFI Session 9


Today is the day, the day that DFI ends. It was a sad feeling walking into the cold hall this morning, knowing that this would be the last time we would work with each other.

We started off the morning by discussing what went well and what we still need help with. It was great to hear that everyone is doing well and feeling more confident within themselves and their ability. It has been so great watching everybody grow over the past 9 weeks.

We discussed ubiquitous learning and how this looks in the classroom and at home. The great thing about ubiquitous learning is that learning is visible and available at all hours of the day not just in the slot of school hours.

Within Manaikalani, ubiquitous is looked at through the Summer Learning Journey, this is where students are able to continue learning over the summer holiday breaks. Below is a comparison of students who completed the Summer Learning Journey and those who didn't.


We also looked at opportunities that are available after the DFI.

  • Visible teaching as inquiry
  • Innovative teachers 
  • Google class on air
  • Tuhi MaiTuhi Atu
  • Online Toolkit

I think in the future I would like to look into the Visible Teaching As Inquiry and the Google On Air. This would be something that I would like to do when I have become a registered teacher. I would like to explore reading and writing and how to engage students especially boys.


The final part of the day was the Google Exam, Level 1. This was a very riveting and exhausting time. We had 3 hours to complete 11 scenarios and 20 multiple choice questions. In order for us to pass we had to get 80% or more.

I passed which was an awesome way to finish the DFI course.


I feel very grateful to have been able to be a part of this course. I have learnt so much from Mark, Dorothy and the visitors we have had over the past 9 weeks. Thank you so much for all the time and effort you have put into this. We all really appreciate it.  


Tuesday, 18 June 2019

DFI Session 8


Cybersmart Curriculum


As a part of the Maniakalani pedagogy that is mandated throughout all of its clusters. This is something that I have seen first hand and have taught myself.

The Cybersmart Curriculum is a big part of Maniakalani and the 4 key aspects
- Connected
- Empowered
- Ubiquitous
- Visible

These aspects set students up to be Cybersmart learners for their lives.

Throughout the year's students should be exposed to powerful, positive and proactive language. When it is used throughout all levels it builds a strong culture.

Cybersmart is taught by Maniakalani teachers but is actively promoted by tech giants all around the world (e.g. Google, Apple etc.)

The Cybersmart curriculum was trialled in 2012, was across the school as a priority. Planned and deliberate teaching. LCS lined up with the teaching of the Cybersmart. Start with the Kawa of Care - and reinforcing our smart learner.

Term 1 - LearnTerm 2 - Create
Term 3 - Share

The intention of the lesson is for students to understand that what they create and share are a part of their digital footprint. This stays with them into their adulthood.


This is the template of the Thoughtful, Positive and Helpful comments.


Gerhard taught us some tips and tricks about Hapara (Teacher Dashboard). He went through in detail about the Highlights, Guided Browsing, Gmail, Folders and groups. 

For me, I had known about these things as I was taught them last year but it was great to be given a refresher. 

We also explored the use of Chromebooks and Ipads which allowed us to look through the student lenses. On the Chromebook, we explored the different shortcuts. I found the tracker pad very touchy and the keys very heavy. It makes me appreciate my Mac Book that I use. I also was exposed to Explain Everything on the Ipads. This was a brand new tool and was something that I could see as being very beneficial to the students. I can understand how it can be utilised in the junior classrooms. I loved that you ae able to record and leave instructions for kids but also that they are able to record their learning. 

We then went onto Screencastify which you can see on the post before this one. 


Miss Holland's Recording

W.A.L.T use Screencastify to record a video about learning

Today at our DFI session we were asked to create a video using a tool called Screencastify. Screencastify is a tool which records your thinking and learning. It is recorded through the webcam and is saved into a Google Folder. Screencastify will be great for the students in my class as it allows them to share their understanding in a digital form, allowing them to be visible in their learning process.

Here is a video of me explaining how to create a blog post following six steps.

Thanks to Manaiakalani for the template example.

Enjoy!


Monday, 17 June 2019

DFI Session 7


As I was unwell on Tuesday, I wasn't able to make the DFI session. Since then I have looked over the notes and will share with you things that stood out for me.

The focus of the session was being Empowered.

As teachers, we are lucky enough to work with a range of students who show many different qualities. And through all those qualities we can empower them to achieve great things.

For some students, they do not feel like they are capable or feel like they have the ability to succeed. Through the use of digital technologies, it allows us to transform how we teach but also transform how the student learns.

Technology empowers students which is something that I have seen over the past year. Technology is not just a tool as it offers students memorable and authentic opportunities for them to succeed. Using tools on the device such as talk to type and read text, students who tend to struggle with literacy have improved fantastically. I put this down to students being able to take out the anxiety that comes to spelling. Students have been able to speak their stories out loud as they think it and the computer will record it for them.

When we are able to share their learning online through digital platforms such as blogger we are able to see that students are actively more engaged.

Tuesday, 4 June 2019

DFI Session 6

Kia ora team,

Being connected 
Real life audience - blogs. Allows them to connect could be even internationally. Publish to the web so they could share, even connect globally

Being connected allows us to keep in touch with other colleagues, share our planning and teaching and much more. It also enables the student's learning to be connected through a visible platform. 


Since 2015 more than 5 outreach clusters have joined;

  • 22,000 children in the outreach
  • 64 English medium primary
  • 10 Catholic special character ( 1 secondary)
  • 3+ Kura Kaupapa Maori and
  • 14 secondary schools
  • 1 special school
  • Smallest school - 25 Te Hapua
  • 1 area school


In Manaiakalani we have a shared language - the pedagogy and kaupapa language
This is made possible because it is visible. People are connected by this shared language Visible learning and teaching, Learn, Create, Share and the Cybersmart curriculum. 

Learn, Create, Share enables them for the future. Creates kids that are open to learning, open to possibilities and new experiences. This also allows for face to face opportunities to connect. Professional learning groups, tool kits and celebrations.

Today we also focused on the use of Media to help assist us with teaching and learning. We explored Youtube (as mentioned in the post before this) and looked at Google Draw and Slides.

For me, I find that I am pretty confident at using Google Drawings and Slides, this is because I used these tools as my foundation for teaching and planning.

This year, I have begun using Google Drawings as a way to extend the thinking of the students in my class. Instead of using Google Slides as the go to, I have begun using Drawings. This allows me to make it more individualised and allows the students to have more accountability for their learning.

On the slides below I have shown you the ways that I have used Google Drawings in my class.


Testing


Today in our DFI session we explored Youtube. We explored how to live stream and how to use playlists. Playlists will be an excellent addition to my tools as the children love listening to music. Above I have created a playlist of music that students can listen to in class. I can continue to add to the playlist and it will update automatically. 

Tuesday, 28 May 2019

DFI Session 5

Visible Learning


Today we looked visible learning and the importance that it has on students success. Visible is one of the 
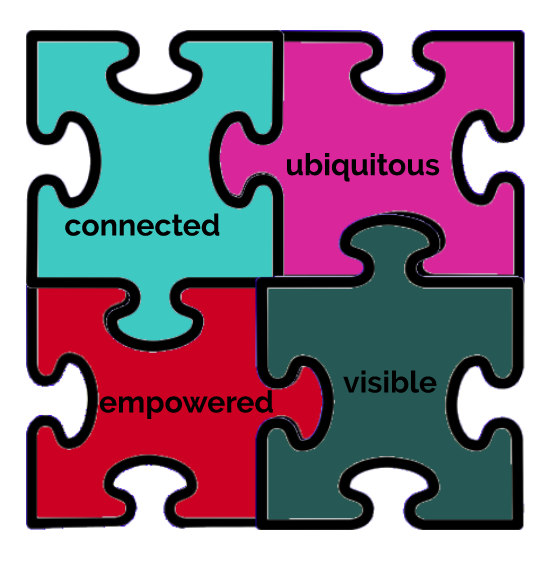
four words that encompass the Manaiakalani pedagogy


Visible means that everyone can see the teaching and learning. Parents, students, teachers and whānau can see what is being taught and what is being learnt.

It was explained that students struggled to succeed because of the learning that was hidden from them and the ones that could read the teacher and knew what to expect would succeed. Some students were constrained by limitations because of the teacher. With the LCS pedagogy, learning is now visible to the learners. This is due to the focus on success criteria, achievement objectives, W.A.L.Ts etc being displayed thus setting them up for success.

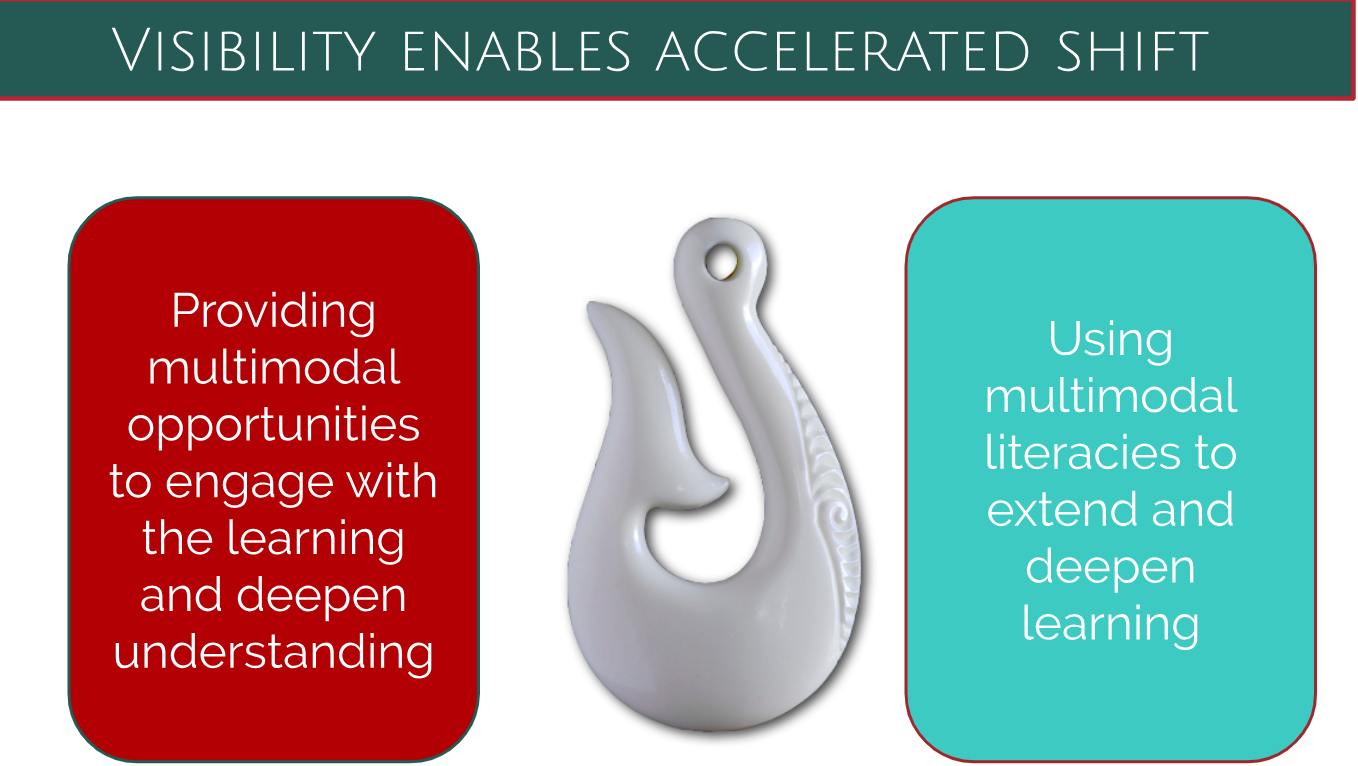
When we talk about Visible Learning, we are talking about the whole learning journey being Visible. We expect the learner, the young person to be at the centre of the learning and for every part of the learning process to be genuinely visible to them:

Visible teaching allows for technology to act as interactive whiteboards.

Google Sites are;
Accessible - online, shared visibly to anyone with the link, removing password barriers

Available - everything the learner needs is present - no scrambling to share material, activities etc at the last minute

Advance - BEFORE it is needed, before the deadlines

And in using Hapara, it allows us to see the students learning in a controlled environment.

From the learner perspective

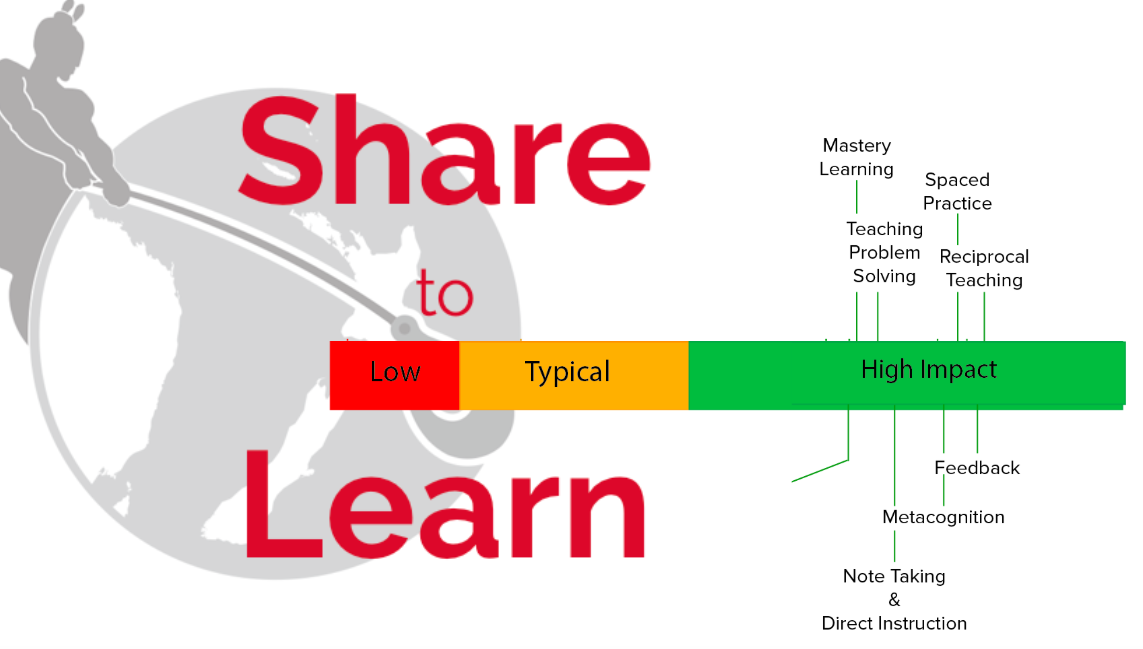
Visible learning should encompass everything that John Hattie has brought to our attention from microteaching to effective feedback and more.

This should be supported by the immediacy of access to the goals and planning for learning, the process of learning and the outcomes of learning-

  1. The class site with the plan for learning
  2. a document a teacher has left feedback on
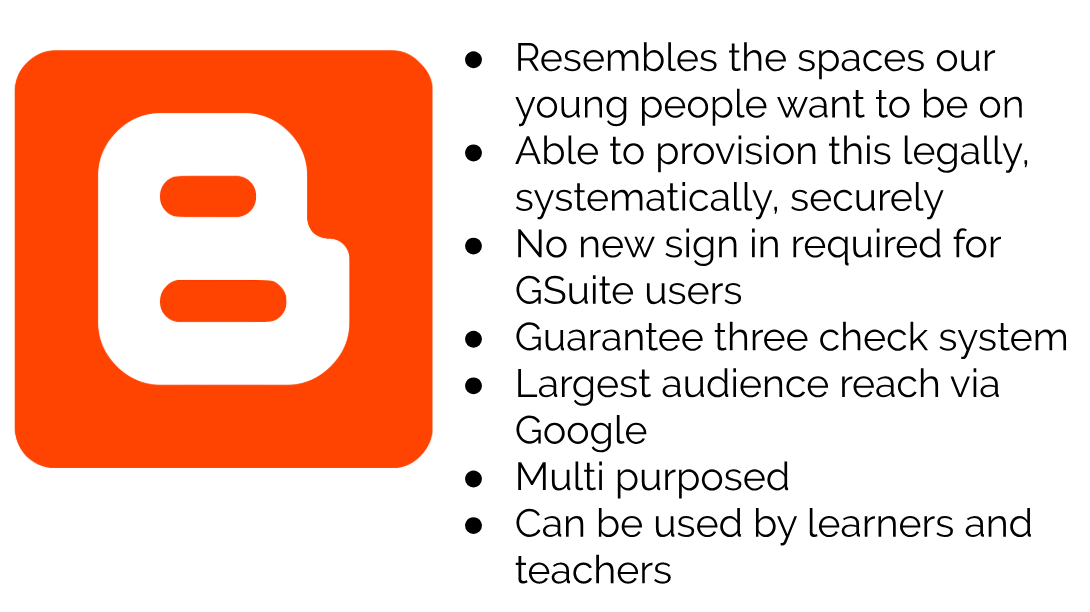
  3. And the blogger symbol - where our teachers and young people share their learning

What does the LCS pedagogy look like when using Google Sites?


For me, my Google Site is at the centre of my teaching. I use my Google Site to teach my students. It acts as a tool which allows students to access their learning. 


In reflection, from the results I got from the form today, I changed up my buttons and changed the navigation of my Site. I found that my teaching from the last term was muddled in between these terms. I had a big changeup. This has made my Google Site more accessible and easier to navigate. This will make the student's life easier when they go and use this next time.  

As I am quite confident with my Google Site and using this tool it was great to be able to have some time that was set aside to make the Site better. Ensuring that the learning is accessible and visible to all. 


Tuesday, 21 May 2019

DFI Session Four


Today we have looked at Google Sites. For me, this was more of a refresher of how to create a Google Site. We also looked at share, the last third of the Manaiakalani pedagogy,


Sharing is not limited to technology. But technology can allow you to share beyond the community and any time constraints that you may encounter.

Sharing with a purpose.
  • Who is your audience
  • Your audience is the people who choose to listen to you.

Blogging allows us to teach students to be digital citizens.


We also looked at Multimodal on a Google Site. 

Multimodal is..

  • Is all about engagement of the learner
  • First impression counts
  • The attraction for the kids. Kids know what they want and what they want to see.
  • Hook the kids in to engage them in the learning
  • Motivate the children to engage with the curriculum


Multimodal allows students to engage in learning in multiple ways. You can use multiple types of texts, use a range of creating tools that engage different learning needs and share to different audiences. This doesn't have to be just using technology, this can be any form of sharing. 


Here are some examples of multimodal that I have used in the past 


And today Nick and I did 


Blog Tip: 

When you are wanting to add a Blog List to your blog, you do this by going to layout. Add a gadget which is named Blog List. When you do this, you can add the URLs of the blogs you want on your blog. I did this for my class. I ordered it by last posted, allowing me to see who has posted and not.


Tuesday, 14 May 2019

DFI Session Three: Dealing with Data


Today we looked at tools that could help us manage data, make work more interesting and ways to help our students succeed with their blogs. 

First, we connected with Dorothy through Google Hangouts. This was a chance for us to use rewindable learning from the week before. Dorothy spoke about Te Hanga - Create. Create is all about hooking the students into their learning. For me 'create' is at the centre of learning, this is because I want students to engage and be motivated. Create can be where students are able to have fun and explore their understanding of models or ways that suit individual needs.


In my class, create is done in both digital and non-digital ways. I feel as though as long students are able to explore, discover, think, imagine, engage and use ideas they are able to create.


A tool that we looked at today was Google Forms. Google forms have many uses, it can help gather assessment, gather thoughts, share ideas, vote on things, create pathways for reading or writing activities.

For me, I know I will use Google Forms for gathering summative assessment. This will allow me to gather data on the knowledge of my students in areas of learnings.

The process of using forms was very simple and straight forward.

Add questions - when adding your questions you can choose many options for the answers, these can include;
  • Short answer
  • Paragraph
  • Multiple choice
  • Checkbox
  • Drop down

Settings - when clicking on the cog in the top right-hand corner. This can allow you to change preferences such as;

  • Limit to completing the form once
  • Restricted to users in the domain/network
  • Making it a general form or creating a quiz where you can score the test.

Sharing/sending - Forms can be shared through

  • Email
  • Link
  • Embedded

Response data - you can also collect data from the responses and create;

  • Graphs
  • Or select response destination - send them to the same or different spreadsheets.


We also explored My Maps. A tool that allows us to create our own maps for different purposes. We were able to import new layers where we could mark the map, create distances, import spreadsheet information (e.g. holiday destinations) etc.

This could be a great tool for students to use for reading activities, exploring maths (geometry) and many other things.


The thing that I found most valuable and useful for the day was Google Spreadsheets. For me, I use spreadsheets already for my teaching and assessment but learnt things that would assist me.

Things you can use are


  • formatting data
  • mean, sum and average
  • filtering data
  • autofill boxes 


Using the freeze tool allows us to freeze columns or rows from moving. You do this by moving the grey line in the top left-hand corner in the box. In doing this you are locking your heading in place as you scroll through the data.

We also explored using conditional formatting. This is under 'format'. When using this it can allow you to colour code your boxes when entering data.


Here is an example of my assessment and conditional formatting in place.

We then got to explore spreadsheets and create charts. We chose a student's blog and showed their yearly posting using charts on the Spreadsheet. This would be an awesome way for us to teach maths (statistics) using their own data. 

Here is an example of my chart. 


Tuesday, 7 May 2019

DFI Session 2


DFI session 2: Workflow


This week we looked at our ways and tools to manage our workload. Tanya a teacher from up north came down and shared her knowledge on extensions that she and other Manaiakalnai use.


The first was Google Keep. This was an extension that allows for you to record notes from meetings, create shopping lists, set reminders and so much more. The great thing about Google Keep for me is that it organises everything in a simple and neat manner. Google Keep is also accessible on your phones, which means that you are able to make lists or notes and even take pictures. These pictures can also capture words from a text and transform them into a Google Doc. Both on the device and phone allows you to share your lists/notes with others which would be beneficial for any work meeting.


Another area we looked at was our Gmail and how we could better organise our inbox for the ever increasing emails we receive. We looked over labels and how these could be used to manage emails. Labels are a great way to store emails that relate to certain topics, for example, a label for your team meetings or an out of the classroom trip.

We also explored the settings in mail. We looked at ways that we could organise emails (configured emails) this allows emails to be organised into folders based on their importance and needs. The emails in the primary folder are the important ones that Google deems. You can change the emails by dropping them into the different folders, thus allowing the emails to be sent to those folders from then on.


One thing that I learnt and can't wait to use is the calendar button in the mail, this allows me to add dates into the calendar from the mail page. This will save me time and effort as I won't have to open another tab and open up the calendar.

Google calendar was another site we explored.  We looked at ways that we could view the calendar to help with viewing and making it easier on the eyes. We explored the colours and how these can help with assigning importance and meetings. I learnt how to use the letters on the keyboard as a shortcut when moving through the days, months, years etc.


Google Hangouts was a new tool that was introduced to me today. We were able to experience this through a chat with Dorothy who was out of the country at the time. Dorothy talked about the importance of Learn from the pedagogy. The most important things that came out of this for me was the reminder that technology is not just a tool, it is a way for us to accelerate student achievement. Another thing that was highlighted again for me is the term rewindable learning and how it is allowing students to have the ability to access learning.


We also learnt ways to manage our tabs. We were introduced to OneTab, Toby Mini and Session Buddy.  I really liked Toby Mini as it allows you to create folders with the tabs to go under. This will be great with organising subjects and sites to use.

I really enjoyed today's session as I was able to explore different extensions and sites that can help manage my workflow.


Tuesday, 30 April 2019

DFI Session One


Kia ora!

This is a summary and reflection of my day at the Manaiakalani Digital Fluency Intensive day. This was a great opportunity to meet new teachers who are on the Manaiakalani journey like me. I also got to meet Dorothy Burt who was the creator of Manaiakalani and Learn, Create, Share. 

This day was full of content that allowed us to enrich our understanding of digital technologies and how we can better use them to further student's learning and achievement as well as our teaching practices. 


Thank you for checking out my blog and let me know if you have any questions. 

Paige.