Pages

Tuesday, 28 May 2019

DFI Session 5

Visible Learning


Today we looked visible learning and the importance that it has on students success. Visible is one of the four words that encompass the Manaiakalani pedagogy


Visible means that everyone can see the teaching and learning. Parents, students, teachers and whānau can see what is being taught and what is being learnt.

It was explained that students struggled to succeed because of the learning that was hidden from them and the ones that could read the teacher and knew what to expect would succeed. Some students were constrained by limitations because of the teacher. With the LCS pedagogy, learning is now visible to the learners. This is due to the focus on success criteria, achievement objectives, W.A.L.Ts etc being displayed thus setting them up for success.

When we talk about Visible Learning, we are talking about the whole learning journey being Visible. We expect the learner, the young person to be at the centre of the learning and for every part of the learning process to be genuinely visible to them:

Visible teaching allows for technology to act as interactive whiteboards.

Google Sites are;
Accessible - online, shared visibly to anyone with the link, removing password barriers

Available - everything the learner needs is present - no scrambling to share material, activities etc at the last minute

Advance - BEFORE it is needed, before the deadlines

And in using Hapara, it allows us to see the students learning in a controlled environment.

From the learner perspective

Visible learning should encompass everything that John Hattie has brought to our attention from microteaching to effective feedback and more.

This should be supported by the immediacy of access to the goals and planning for learning, the process of learning and the outcomes of learning-

  1. The class site with the plan for learning
  2. a document a teacher has left feedback on
  3. And the blogger symbol - where our teachers and young people share their learning

What does the LCS pedagogy look like when using Google Sites?


For me, my Google Site is at the centre of my teaching. I use my Google Site to teach my students. It acts as a tool which allows students to access their learning. 


In reflection, from the results I got from the form today, I changed up my buttons and changed the navigation of my Site. I found that my teaching from the last term was muddled in between these terms. I had a big changeup. This has made my Google Site more accessible and easier to navigate. This will make the student's life easier when they go and use this next time.  

As I am quite confident with my Google Site and using this tool it was great to be able to have some time that was set aside to make the Site better. Ensuring that the learning is accessible and visible to all. 


Tuesday, 21 May 2019

DFI Session Four


Today we have looked at Google Sites. For me, this was more of a refresher of how to create a Google Site. We also looked at share, the last third of the Manaiakalani pedagogy,


Sharing is not limited to technology. But technology can allow you to share beyond the community and any time constraints that you may encounter.

Sharing with a purpose.
  • Who is your audience
  • Your audience is the people who choose to listen to you.

Blogging allows us to teach students to be digital citizens.


We also looked at Multimodal on a Google Site. 

Multimodal is..

  • Is all about engagement of the learner
  • First impression counts
  • The attraction for the kids. Kids know what they want and what they want to see.
  • Hook the kids in to engage them in the learning
  • Motivate the children to engage with the curriculum


Multimodal allows students to engage in learning in multiple ways. You can use multiple types of texts, use a range of creating tools that engage different learning needs and share to different audiences. This doesn't have to be just using technology, this can be any form of sharing. 


Here are some examples of multimodal that I have used in the past 


And today Nick and I did 


Blog Tip: 

When you are wanting to add a Blog List to your blog, you do this by going to layout. Add a gadget which is named Blog List. When you do this, you can add the URLs of the blogs you want on your blog. I did this for my class. I ordered it by last posted, allowing me to see who has posted and not.


Tuesday, 14 May 2019

DFI Session Three: Dealing with Data


Today we looked at tools that could help us manage data, make work more interesting and ways to help our students succeed with their blogs. 

First, we connected with Dorothy through Google Hangouts. This was a chance for us to use rewindable learning from the week before. Dorothy spoke about Te Hanga - Create. Create is all about hooking the students into their learning. For me 'create' is at the centre of learning, this is because I want students to engage and be motivated. Create can be where students are able to have fun and explore their understanding of models or ways that suit individual needs.


In my class, create is done in both digital and non-digital ways. I feel as though as long students are able to explore, discover, think, imagine, engage and use ideas they are able to create.


A tool that we looked at today was Google Forms. Google forms have many uses, it can help gather assessment, gather thoughts, share ideas, vote on things, create pathways for reading or writing activities.

For me, I know I will use Google Forms for gathering summative assessment. This will allow me to gather data on the knowledge of my students in areas of learnings.

The process of using forms was very simple and straight forward.

Add questions - when adding your questions you can choose many options for the answers, these can include;
  • Short answer
  • Paragraph
  • Multiple choice
  • Checkbox
  • Drop down

Settings - when clicking on the cog in the top right-hand corner. This can allow you to change preferences such as;

  • Limit to completing the form once
  • Restricted to users in the domain/network
  • Making it a general form or creating a quiz where you can score the test.

Sharing/sending - Forms can be shared through

  • Email
  • Link
  • Embedded

Response data - you can also collect data from the responses and create;

  • Graphs
  • Or select response destination - send them to the same or different spreadsheets.


We also explored My Maps. A tool that allows us to create our own maps for different purposes. We were able to import new layers where we could mark the map, create distances, import spreadsheet information (e.g. holiday destinations) etc.

This could be a great tool for students to use for reading activities, exploring maths (geometry) and many other things.


The thing that I found most valuable and useful for the day was Google Spreadsheets. For me, I use spreadsheets already for my teaching and assessment but learnt things that would assist me.

Things you can use are


  • formatting data
  • mean, sum and average
  • filtering data
  • autofill boxes 


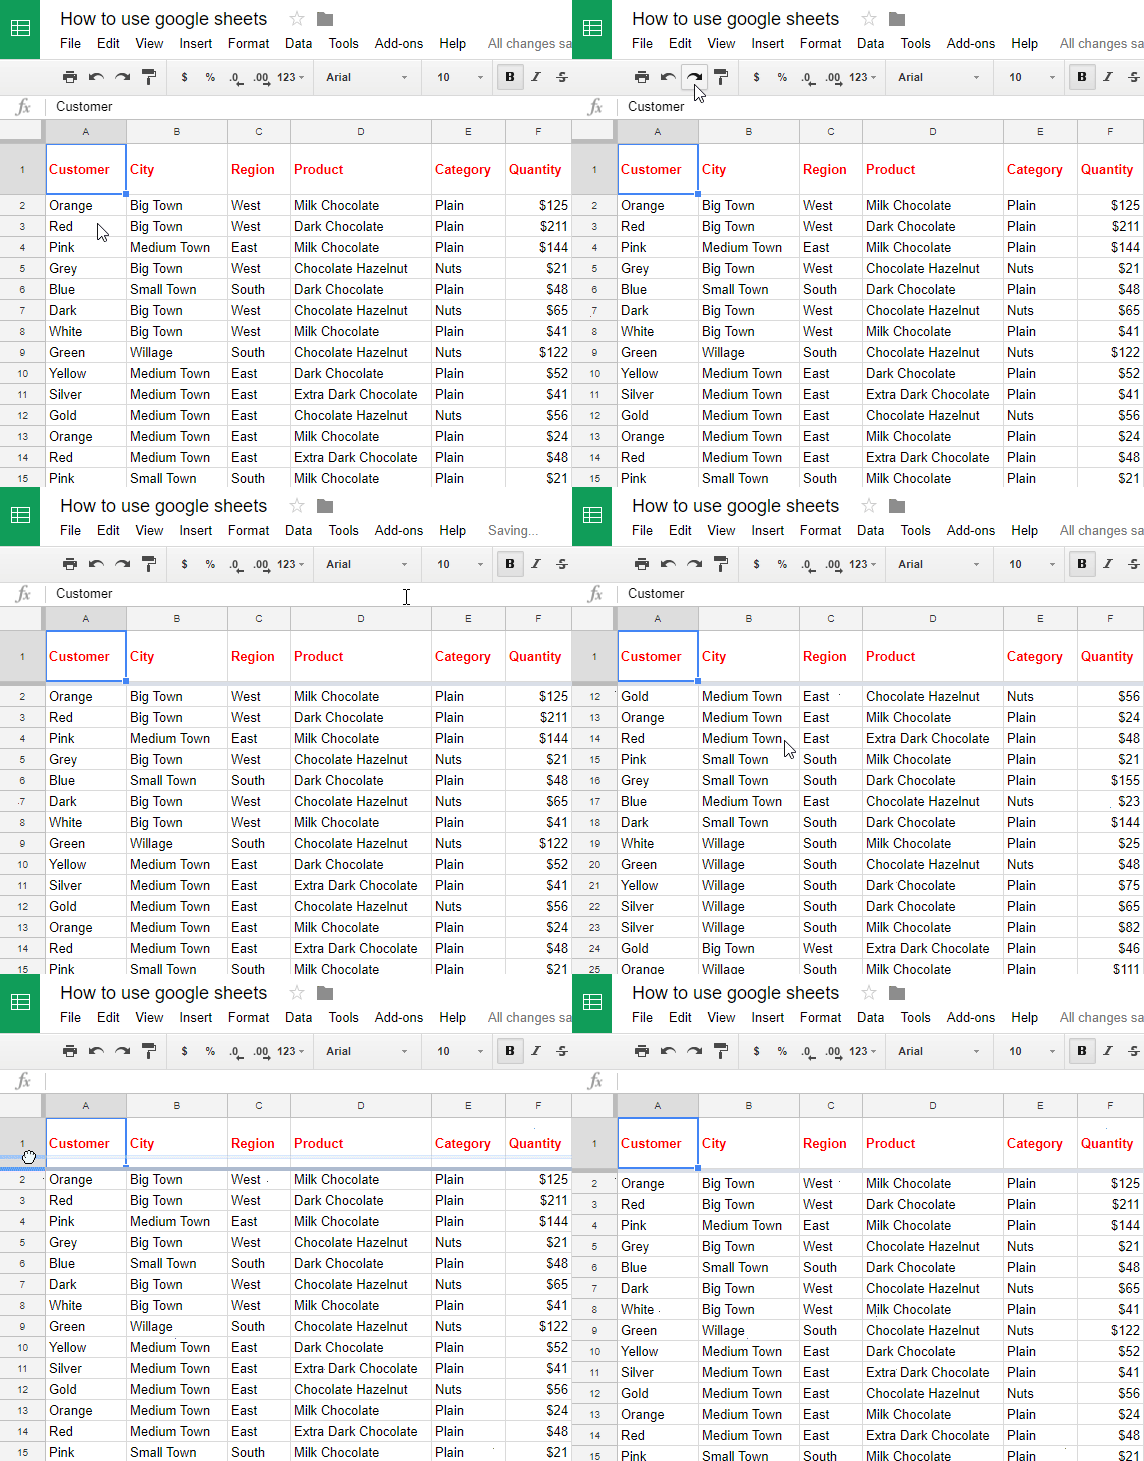
Using the freeze tool allows us to freeze columns or rows from moving. You do this by moving the grey line in the top left-hand corner in the box. In doing this you are locking your heading in place as you scroll through the data.

We also explored using conditional formatting. This is under 'format'. When using this it can allow you to colour code your boxes when entering data.


Here is an example of my assessment and conditional formatting in place.

We then got to explore spreadsheets and create charts. We chose a student's blog and showed their yearly posting using charts on the Spreadsheet. This would be an awesome way for us to teach maths (statistics) using their own data. 

Here is an example of my chart. 


Tuesday, 7 May 2019

DFI Session 2


DFI session 2: Workflow


This week we looked at our ways and tools to manage our workload. Tanya a teacher from up north came down and shared her knowledge on extensions that she and other Manaiakalnai use.


The first was Google Keep. This was an extension that allows for you to record notes from meetings, create shopping lists, set reminders and so much more. The great thing about Google Keep for me is that it organises everything in a simple and neat manner. Google Keep is also accessible on your phones, which means that you are able to make lists or notes and even take pictures. These pictures can also capture words from a text and transform them into a Google Doc. Both on the device and phone allows you to share your lists/notes with others which would be beneficial for any work meeting.


Another area we looked at was our Gmail and how we could better organise our inbox for the ever increasing emails we receive. We looked over labels and how these could be used to manage emails. Labels are a great way to store emails that relate to certain topics, for example, a label for your team meetings or an out of the classroom trip.

We also explored the settings in mail. We looked at ways that we could organise emails (configured emails) this allows emails to be organised into folders based on their importance and needs. The emails in the primary folder are the important ones that Google deems. You can change the emails by dropping them into the different folders, thus allowing the emails to be sent to those folders from then on.


One thing that I learnt and can't wait to use is the calendar button in the mail, this allows me to add dates into the calendar from the mail page. This will save me time and effort as I won't have to open another tab and open up the calendar.

Google calendar was another site we explored.  We looked at ways that we could view the calendar to help with viewing and making it easier on the eyes. We explored the colours and how these can help with assigning importance and meetings. I learnt how to use the letters on the keyboard as a shortcut when moving through the days, months, years etc.


Google Hangouts was a new tool that was introduced to me today. We were able to experience this through a chat with Dorothy who was out of the country at the time. Dorothy talked about the importance of Learn from the pedagogy. The most important things that came out of this for me was the reminder that technology is not just a tool, it is a way for us to accelerate student achievement. Another thing that was highlighted again for me is the term rewindable learning and how it is allowing students to have the ability to access learning.


We also learnt ways to manage our tabs. We were introduced to OneTab, Toby Mini and Session Buddy.  I really liked Toby Mini as it allows you to create folders with the tabs to go under. This will be great with organising subjects and sites to use.

I really enjoyed today's session as I was able to explore different extensions and sites that can help manage my workflow.